


Using one of the smaller leaves, place the colorful side down and fold the points in. Begin to roll the leaf from one side.

Take a second leaf and fold the center point down. Place the first rolled leaf in the center, fold down the side points on the second leaf and wrap both sides around.

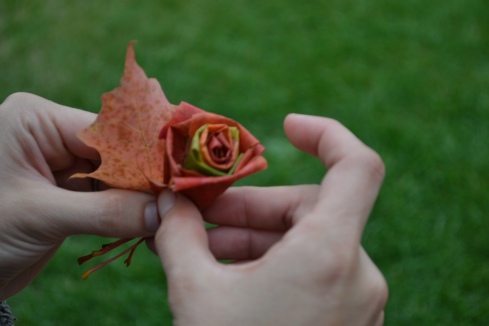
Continue to add leaves, rotating the flower as you go to get an even size. Work with the smaller leaves towards the larger ones. When you rotate it also helps to keep the sides tucked in so that it doesn’t unravel.


When you have added all your leaves or reach desired size, pinch the leaf stems tightly and begin to wrap with florist tape. Trim the stem ends and cut. Finally if you are wanting a “long stem” use a stick and attach to the flower by wrapping it with a bit more florist tape.

 Then ‘ta da’ you’re done! I made just a few… and stuck them in a random vase I threw a while back. My girls also made one each and took them to their teachers – so sweet, they are!


No comments:
Post a Comment